
I had to look after my 7 year old sister, and I thought what better thing to do than bake cookies? So using (and tweaking just a tad) Tanya Burr's chocolate cookies recipe, we scrambled to find the right ingredients and set off baking. (You can find and follow Tanya's recipe here). I totally recommend that you follow Tanya's recipe rather than mine, but here is what we did:


You should be able to see the consistency in this photo (minus the egg you can see, that's the next step). So, once you have reached this stage, you will now want to crack your large egg into the mixture. Again, you must whisk this in until it is combined.

Now, you gradually have to add in the self-raising flour and mix it in. You mustn't add it in all at once else it will not work as well and you will make such a mess! I must warn you folks who, like me, are using a hand whisk - this is hard work and does take a while to do... It's a good workout though! You must continue gradually adding the flour and mixing it until everything is combined. You will know it is combined as it will look very dough-like, and a little biscuity/crumbly in texture (you really must watch Tanya's video to understand what I mean). If your mixture is looking dry at this point, now is the time to add a dash of milk and mix it in.
Unfortunately, I forgot to take pictures of the last couple of stages, but I shall try my best to direct you!
Next, you must make sure your hands are lovely and clean! This is so important, as now you are going to be getting hands on with the dough and chocolate pieces. You are going to have to add the chocolate pieces into the mixture, making sure it is evenly spread through. The best way to ensure this is by grabbing the dough from the bottom (with the chocolate pieces in) and folding it through. You may not even need to add all of your chocolate - myself and Mia (my sister) didn't, so we ended up eating the rest! - just as long as the chocolate chunks are all evenly spread!
Once this is done, you will need to grab a palm-full of the cookie mixture and roll it in a ball. We did ours quite large, but I guess it's up to you how big you want your cookies to be. We then placed them on a baking tray, which we covered in butter to ensure the cookies didn't stick to the bottom (however, if you have parchment paper, this might be a better option). Make sure there is enough room between your 'cookie dough balls' as they will spread out as they bake.
We ended up using two baking trays, which had 4 dough balls on each. Be sure you use oven gloves or a thick towel to place the trays in the oven, as it is hot, hot, hot! (Anyone else remember Big Cook, Little Cook? I was too old to watch it, but my younger sister used to love it! I mean, it wasn't too bad for children's TV...)
Once in the oven, set the timer for 10 minutes. You may want to relax in this time, but no! There's no rest for the wicked! I highly recommend that you use this time to wash the dishes, as this saves you doing it later. Remember, you can treat yourself with those cookies afterwards!
When the 10 minutes is up, using oven gloves/thick towel, remove them from the oven (be sure that you turn the oven off after). Leave them to cool ideally on a cooling tray, but we didn't have one. If you don't have one either, just leave them on the baking tray. This process does take a little while longer, as you must wait for around 30-45 minutes for them to cool. Trust me, it is worth the wait.


Mine didn't turn out perfectly, they were slightly burnt and kind of under-cooked, but I don't really mind that! They tasted nice to me, and that's all that matters right? But this is why I suggest you follow Tanya, rather than me, so please check out her original recipe! If you followed mine, well, I hope they turned out okay for you, but I'm really sorry if not!
Let me know if you tried this recipe out and how it turned out! Hope you have fun making these cookies, my sister and I certainly did! It's an ideal opportunity to spend time with your family members. If you have any younger siblings, get them involved in the mixing processes! They'll have so much fun, and will also love you for letting them get involved with the baking.
Cheerio x
Twitter: @xo_chelseey
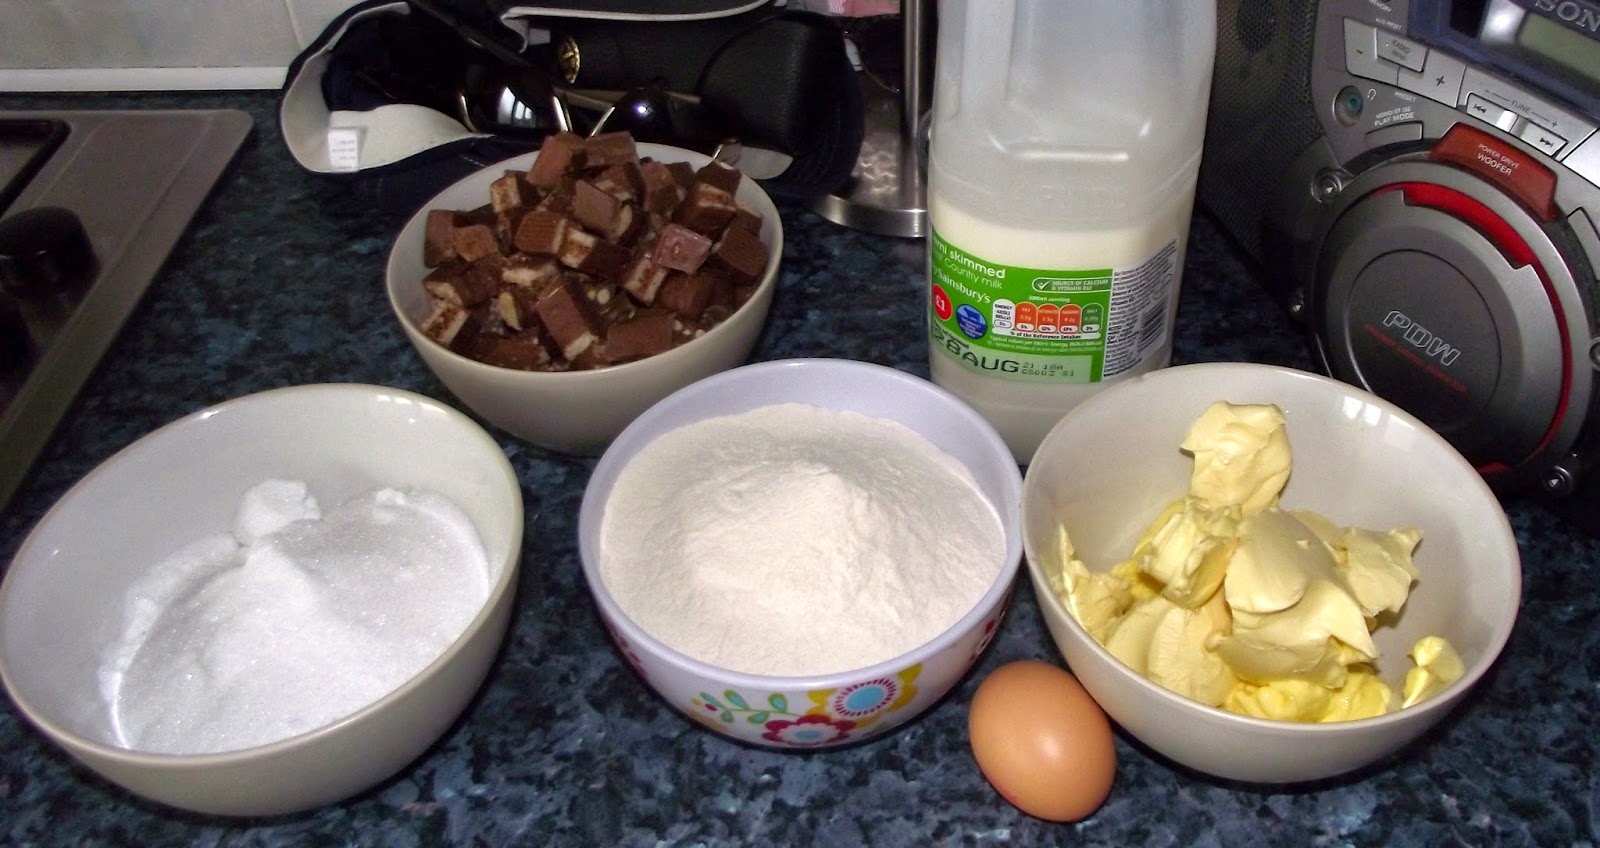
First of all, these are the ingredients you will need:
- 1 large egg
- 200g butter
- 300g caster sugar
-325g self-raising flour
- a dash of milk (if needed)
- We used 400g chocolate (broken up) as we were using things that we could find around our house as we couldn't go to the shops. Therefore, we used ALL the chocolatey things we could see. This included: Time Outs, Wispa bars, Malteaser bars, Malteasers, Fudge, Milkystars! A very interesting combination. However Tanya used 200g of white chocolate and 200g of milk chocolate. (You'll find this by following her recipe).
Once you have weighed out all your ingredients, first and foremost you will want to preheat the oven at 200 degrees celsius! When that is done, add the butter and the caster sugar into a mixing bowl and mix together (ideally using an electric whisk, but we unfortunately couldn't find ours, so mixed it all by hand) until combined. It should be a lovely pale yellow colour, which looks light and fluffy.
Now, you gradually have to add in the self-raising flour and mix it in. You mustn't add it in all at once else it will not work as well and you will make such a mess! I must warn you folks who, like me, are using a hand whisk - this is hard work and does take a while to do... It's a good workout though! You must continue gradually adding the flour and mixing it until everything is combined. You will know it is combined as it will look very dough-like, and a little biscuity/crumbly in texture (you really must watch Tanya's video to understand what I mean). If your mixture is looking dry at this point, now is the time to add a dash of milk and mix it in.
Unfortunately, I forgot to take pictures of the last couple of stages, but I shall try my best to direct you!
Next, you must make sure your hands are lovely and clean! This is so important, as now you are going to be getting hands on with the dough and chocolate pieces. You are going to have to add the chocolate pieces into the mixture, making sure it is evenly spread through. The best way to ensure this is by grabbing the dough from the bottom (with the chocolate pieces in) and folding it through. You may not even need to add all of your chocolate - myself and Mia (my sister) didn't, so we ended up eating the rest! - just as long as the chocolate chunks are all evenly spread!
Once this is done, you will need to grab a palm-full of the cookie mixture and roll it in a ball. We did ours quite large, but I guess it's up to you how big you want your cookies to be. We then placed them on a baking tray, which we covered in butter to ensure the cookies didn't stick to the bottom (however, if you have parchment paper, this might be a better option). Make sure there is enough room between your 'cookie dough balls' as they will spread out as they bake.
We ended up using two baking trays, which had 4 dough balls on each. Be sure you use oven gloves or a thick towel to place the trays in the oven, as it is hot, hot, hot! (Anyone else remember Big Cook, Little Cook? I was too old to watch it, but my younger sister used to love it! I mean, it wasn't too bad for children's TV...)
Once in the oven, set the timer for 10 minutes. You may want to relax in this time, but no! There's no rest for the wicked! I highly recommend that you use this time to wash the dishes, as this saves you doing it later. Remember, you can treat yourself with those cookies afterwards!
When the 10 minutes is up, using oven gloves/thick towel, remove them from the oven (be sure that you turn the oven off after). Leave them to cool ideally on a cooling tray, but we didn't have one. If you don't have one either, just leave them on the baking tray. This process does take a little while longer, as you must wait for around 30-45 minutes for them to cool. Trust me, it is worth the wait.
Mine didn't turn out perfectly, they were slightly burnt and kind of under-cooked, but I don't really mind that! They tasted nice to me, and that's all that matters right? But this is why I suggest you follow Tanya, rather than me, so please check out her original recipe! If you followed mine, well, I hope they turned out okay for you, but I'm really sorry if not!
Let me know if you tried this recipe out and how it turned out! Hope you have fun making these cookies, my sister and I certainly did! It's an ideal opportunity to spend time with your family members. If you have any younger siblings, get them involved in the mixing processes! They'll have so much fun, and will also love you for letting them get involved with the baking.
Cheerio x
Twitter: @xo_chelseey


Be First to Post Comment !
Post a Comment